Friday, August 13, 2010

Maternity leave project guest post: Jenn from Delicious Ambiguity


Hi everyone! I'm Jenn from Delicious Ambiguity and I am so excited to be guest posting over here today! I recently made a diaper cake for a friend of mine who just had her second child. Diaper cakes make the perfect gift for any expecting mom because they are super cute, easy to make, and great when your tight on a budget and have a friend to split the cost (and work with)!


Today I am going to share with you how to make your own fast, easy and beautiful diaper cake on a budget.


Supplies you will need:

*2 big packages of white diapers. I recommend using a size 1 or 2 diaper instead of a newborn size so the mother doesn’t need to take it apart right away in order to use it before the baby grows out of that size diaper.

*4-5 yards ribbon (I used 3 colors: 1 thick ribbon and 2 thin ribbons)

*Cardboard circle or something sturdy (like a big pizza pan or serving tray)

*Can of formula or bottle of champagne for the centre

*Clear hairbands or rubber bands

*Wooden dowel or chopsticks: this will go through all the layers to hold it together.

*A cute topper for the cake: I used 4 small stuffed animals but you could use ribbon and fake flowers or even a pair of baby shoes if you wanted to.

*Clear cellophane to wrap the finished cake with


Assemble:


1. Place your bottle of champagne (or formula) in the center of your cardboard circle or pan.


2.Take a diaper and roll it tight then secure with an elastic band. As you roll more diapers, keep adding them to the base around the bottle of champagne until your cardboard circle or pan is full.


3. You will notice that there will probably be a bit of room between the bottle and the rolled diapers so go ahead and slide some unrolled diapers around the bottle until it is nice and snug.


4. Once your layer is full, secure all of the diapers together with an elastic band.


5. Continue this process for each layer of diapers making the base smaller by 1 row of diapers for each layer. I did 3 layers but 2 and 4 layer diaper cakes look great as well.


6. Take your widest ribbon and cover the rubber band with it. It works best to safety pin the ribbon closed in the back or hot glue them. I alternated the smaller sized ribbon per tier and tied a small bow to finish it off.


7. When all the layers are made and the ribbon is attached, stack the cake and insert the wooden dowel or chopsticks through the centre, placing it as close to the middle of the layers as you can.


8. Place your stuffed animals on the top of the cake hiding the wooden chopsticks that are sticking a bit out of the top of the cake. Secure with a rubber band and wrap the rubber band with ribbon in the same way as you did the other tiers.


9. Wrap the entire cake in cellophane and attach a ribbon to the very top of the cake and you are finished! The whole thing should take about an hour from start to finish.


10. Go ahead and admire your masterpiece. It really will look soooo cute you'll contemplate making more babies so you can keep it for yourself.
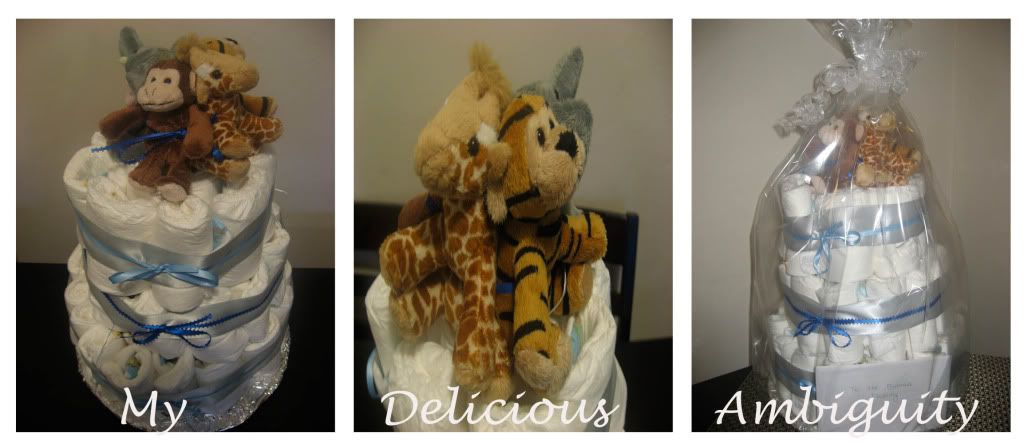


I ment to take photos as I went but my friend and I "threw" this together while our toddlers played in the same room. Our sons were hungry, tired and ultimately wanted to "help" us make the "pretties" (as my son called it). If you want a great tutorial with photos check out this tutorial at Craft Envy.


And if you want to try your hand at an unrolled diaper cake I love the tutorial and the end result from Green Apple Orchard.
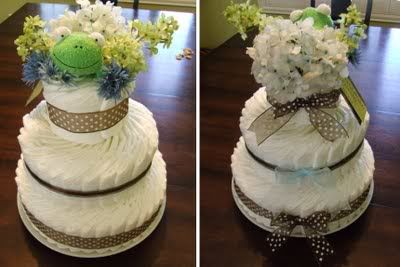


Have you made a diaper cake recently? I'd love to hear some tips or neat ideas to try out next time as there are sure to be many more diaper cake making adventures in the months to come.


I hope you’ll stop on over to Delicious Ambiguity and say hello! And of course you can stalk find me on Feedburner, Twitter and Facebook.


Thanks for having me today Andreann and congratulations on baby Merrick!


Photobucket


thanks Jenn!

Thursday, August 12, 2010

Maternity leave guest Project: Emily from Nap-time Creations

Hi everyone, our little gang is still going great, papa stays home with us for his last vacation week (and I'm really grateful for that!)

Now let me introduce you Emily from Nap-time creations. She's a stay-at-home mommy of a little boy with another one coming, and lives in Hong Kong. She has lots of great projects and tutorials like those training pants, this lovely felt playmat and how to turn daddy's T into a toddler pyg. For now she's showing us cute little booties she did...

Hi Everyone! I'm stopping over from Nap-Time Creations today and thought I would share a recent (and fun!) project with you all. Best of all the pattern is free online! Stop over and check out my site when you get a chance!
I've been doing a lot of crochet lately... we've been travelling and I can do it in the car, I just got new yarn and I'm away from home, so some projects are on hold. I bought some new yarn last week though, so I have been having fun trying a few patterns out. I found this one on a crochet pattern- a- day calendar courtesy of Bernat. My first booties is the one on the left. When I finished it didn't quite look like the pattern, but I wasn't sure where I went wrong. I carefully followed the directions for the second and as you can see, it looks more like a boot and less like a sock.

Correct on the left, wrong on the right....
I ripped out the sock like one and now I have a great little pair of booties. Not sure what size they are, I followed the 0-3 month pattern, but used a little different size crochet hook.
I have several other bootie patterns I want to try, but some are knit, so will have to wait until Aug. when we get home as all my knitting needles are in Hong Kong. Also, I don't know if I am having a boy or a girl, so I might make a few booties for each gender, just for fun!

thanks again Emily!

Monday, August 9, 2010

Merrick's rag quilt (how-to)


While I have a little break from nursing, I'm going to show you how I made my first rag quilt, for little Merrick!


I bought a bag of lightblankets with a jungle theme, and a soft plushie fleece blanket that had a lion embroidery on it. I've calculated how many squarres and how large I could cut with the fleece blanket and designed the squarres to cut from my light blankets accordingly. 20 in that case: 5 greens, 7 yellows and 8 animal pattern in my case.


I've matched every squarre from the light blankets to one of the plushie blanket and sewn an X with my sewing machine using a regular straigth stitch.


Sewn 4 rows of 5, right side facing OUT....


...Then sewn them together


Cut every CM or so around the edge (which I've sewn 2 times with a straight stitch) and also cut in between all the squarres

And launder it a few times.


Here it is, in all it's fluffyness!

Intense Debate Comments

About Me

My photo
I'm a 23 yr old mommy of two little pixies, sharing my life with my best friend. We live in La Belle Province, French is our first language. In the middle of nursing and caring for a toddler's need, I sew, draw, paint, and take pictures to tell. We also struggle to live an healthy life, apparently surrounded by people that doesn't care much, and we're on budget, too!

Labels

2nd About me activity air alar altar alternative apples apron art astrology Aux Demilunes avatar baby baby food beach bedding Beltane birth stories Birthday Crown birthdays bloomers Blue body painting books boy bread breadmaking breastfeeding Butterbeer and Fantomp cake cake toppers camera Candy Fairy Cauldron celebration child's craft children's book children's cloth cloth cubes clothing collage cookies cooking Costume Craft craft room creature crochet crown cupcakes cushions decor dessert diapers diner dinning table diy DIY day Dollhouse dolls dragon drawing dreadlocks dress earth eco education elementals elf etsy update fabric fairy fall felt felt food fire flower food Full moon art fun furniture gardening gift gifts girl girl room giveaway glass god granola green Guest Post Halloween handmade gift Harry Potter harvest heart herbs holidays home hoodie Imbolc inspiration island jewelry kid kid toys kid's art kitchen kitchen witchery knitting landscape less meat Litha lunch Mabon Magic make your monday Mariann the photographer Master Bedroom maternity Maypole meditation Mother Earth move my project under 15 necklace needlefelting onesie orange organization Ostara pagan painting path peg personal photoshot pink pixie suit plaid play kitchen playing with you food plush Pointed Hat pointed hood Poppet Potion pregnancy pretend play pumpkin punk Québec Quidditch quilt rag quilt rant recipe reinvented retro-cooking month review rhythm right now I AM ritual sabbath Samhain sea sea house seasons sewing sharpies shoes shop siblings skirt soap something about me spellbook spells spinning spirited child spring strawberries swap swaps sweater tattoo tea tea party the color red The Crafty Witch the horde of angry pagans this moment Thrifty finds to-do list toddler toddler crafts toy toymaking tradition tutorial tutu unicorn vacation valentine Waldorf Waldorf doll wand water watercolor Wish list Witch witchy things wood painting wooden toys yarn along yarn along. crochet yellow yoga Yule