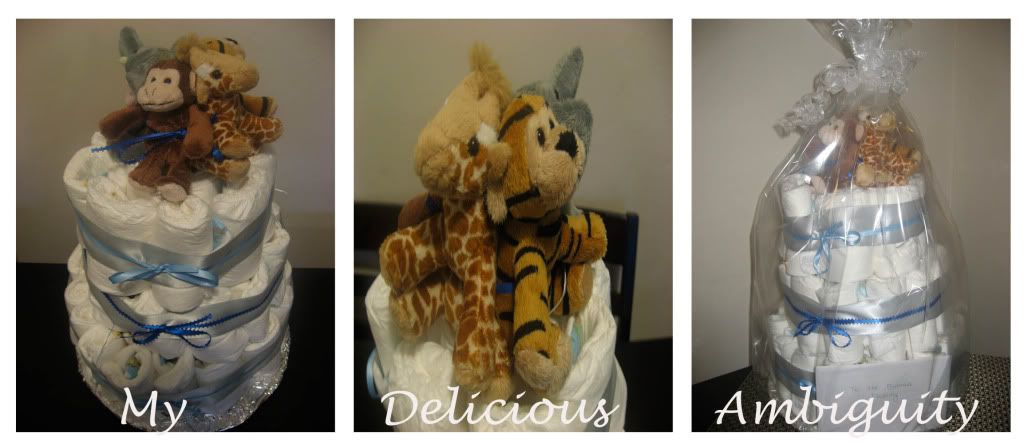
 Hi everyone! I'm Jenn from Delicious Ambiguity and I am so excited to be guest posting over here today! I recently made a diaper cake for a friend of mine who just had her second child. Diaper cakes make the perfect gift for any expecting mom because they are super cute, easy to make, and great when your tight on a budget and have a friend to split the cost (and work with)!
Today I am going to share with you how to make your own fast, easy and beautiful diaper cake on a budget.
Supplies you will need:
*2 big packages of white diapers. I recommend using a size 1 or 2 diaper instead of a newborn size so the mother doesn’t need to take it apart right away in order to use it before the baby grows out of that size diaper.
*4-5 yards ribbon (I used 3 colors: 1 thick ribbon and 2 thin ribbons)
*Cardboard circle or something sturdy (like a big pizza pan or serving tray)
*Can of formula or bottle of champagne for the centre
*Clear hairbands or rubber bands
*Wooden dowel or chopsticks: this will go through all the layers to hold it together.
*A cute topper for the cake: I used 4 small stuffed animals but you could use ribbon and fake flowers or even a pair of baby shoes if you wanted to.
*Clear cellophane to wrap the finished cake with
Assemble:
1. Place your bottle of champagne (or formula) in the center of your cardboard circle or pan.
2.Take a diaper and roll it tight then secure with an elastic band. As you roll more diapers, keep adding them to the base around the bottle of champagne until your cardboard circle or pan is full.
3. You will notice that there will probably be a bit of room between the bottle and the rolled diapers so go ahead and slide some unrolled diapers around the bottle until it is nice and snug.
4. Once your layer is full, secure all of the diapers together with an elastic band.
5. Continue this process for each layer of diapers making the base smaller by 1 row of diapers for each layer. I did 3 layers but 2 and 4 layer diaper cakes look great as well.
6. Take your widest ribbon and cover the rubber band with it. It works best to safety pin the ribbon closed in the back or hot glue them. I alternated the smaller sized ribbon per tier and tied a small bow to finish it off.
7. When all the layers are made and the ribbon is attached, stack the cake and insert the wooden dowel or chopsticks through the centre, placing it as close to the middle of the layers as you can.
8. Place your stuffed animals on the top of the cake hiding the wooden chopsticks that are sticking a bit out of the top of the cake. Secure with a rubber band and wrap the rubber band with ribbon in the same way as you did the other tiers.
9. Wrap the entire cake in cellophane and attach a ribbon to the very top of the cake and you are finished! The whole thing should take about an hour from start to finish.
10. Go ahead and admire your masterpiece. It really will look soooo cute you'll contemplate making more babies so you can keep it for yourself.
I ment to take photos as I went but my friend and I "threw" this together while our toddlers played in the same room. Our sons were hungry, tired and ultimately wanted to "help" us make the "pretties" (as my son called it). If you want a great tutorial with photos check out this tutorial at Craft Envy.
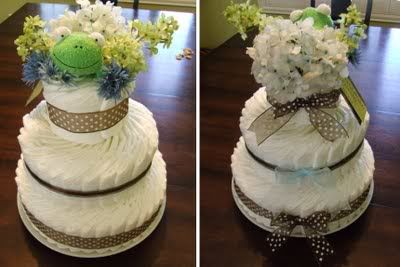
And if you want to try your hand at an unrolled diaper cake I love the tutorial and the end result from Green Apple Orchard.
Have you made a diaper cake recently? I'd love to hear some tips or neat ideas to try out next time as there are sure to be many more diaper cake making adventures in the months to come.
I hope you’ll stop on over to Delicious Ambiguity and say hello! And of course you can stalk find me on Feedburner, Twitter and Fac
Thanks for having me today Andreann and congratulations on baby Merrick!
thanks Jenn!


No comments:
Post a Comment
Thanks for commenting!